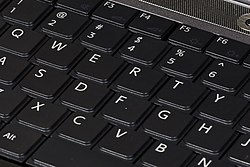
Laptop Keyboard Repair

Laptop keyboard repair is one of the more common jobs performed on laptops, it’s also one of the easier repairs to carry out providing the following hasn’t happened.

A spill of anything but water on a keyboard will 9 times out of 10 leave you in a situation that involves replacing the keyboard all together.

Keyboards are manufactured in such a way that leaves little to no room to clean out messy spills.

Basically any liquid containing sugar (soft drinks, beer, wine, coffee or tea) are bad news…

A couple of laptop keyboard repair do’s and don’ts in the event of a spill..

Laptop Keyboard Repair

DON’T panic. Panic makes us do stupid things, think before you react.

DON’T use a hairdryer to dry out a spill…melted keys are hard to type with.

DON’T tilt the machine upside down or on its side (if you do feel the need it’s better to tilt it to the side that houses the CDROM as the CDROM area inside the machine has less components on it than the mainboard).

DO switch the machine off immediately and resist switching it back on until you’re certain the spill has dried. Survey the damage after you’ve dried it out. At this point you could remove the keyboard and try the machine using an external keyboard to see if anything else has been affected.

This diagram shows what a basic keyboard looks like, the ribbon cable which connects the keyboard to the motherboard is indicated by the red arrow.

Laptop Keyboard Repair

The ribbon cable can also be located on the front edge of the keyboard depending on the age and model of the laptop you have.
Note the keyboard holder (thin strip of plastic) that sits on the top edge of the laptop keyboard needs to be removed to get access to the screws holding the keyboard down.
Most of the current laptop keyboards are like the diagram below.

Laptop Keyboard Repair

Traditionally a spill will kill a keyboard or at best at least some function will be lost. I have only ever been successful with a laptop keyboard repair that involved a water spill, anything else normally results in a tragic loss and putting your old faithful keyboard to rest.. RIP.

How to replace a laptop keyboard

Keyboard removal is relatively simple, most keyboards are held in place with a couple of screws, and in some models, also a couple of screws that may need to be removed from the base of the unit. A quick call to your local authorized laptop computer repairer should help to determine what screws need to be removed (if they know their stuff).

The keyboard connector is something that needs a little care when unplugging, if you are too heavy handed and damage the connector in any way you may even damage the mainboard also which can cause a world of pain.. be careful.

See below for the most commonly used connector.

Laptop Keyboard Repair

In order to release the keyboard ribbon cable ease the connector edge upwards only about 2 or 3 millimetres, the ribbon should now slip out with ease. The refitting of the keyboard once cleaned or replaced is just done in reverse.

Broken off some keys??

Whoops, these are a difficult one to fix and once again often end in having to replace the keyboard entirely. Some very small plastic mounting arms hold the keys in place and are often broken, either that or the little clips that the mounting arms click into break. It’s handy to have or get a hold of an old keyboard of the same type in order to poach the parts you need.

You may need some tweezers and a steady hand to fix these. The best thing I can suggest is to gently remove one of the other keys to see exactly how the mounting arms sit, once you have an idea of how it should look grab those tweezers and be patient, it may take some time.

We will soon have some detailed photos showing how these are assembled, until then remember to be patient and gentle.

If you seek professional advice regarding your laptop keyboard repair, the repairer will probably try to sell you a new keyboard complete with hefty labour charge to fix this for you. With the tips we have given you here, you can do your own laptop keyboard repair, fit it yourself and pocket the savings.

Laptop Keyboard Repair and Replacement

Are you considering laptop keyboard repair? You might think twice if you happen to be the lucky owner of a Compaq Presario, because replacing the keyboard rather than repairing it could be a lot less expensive. Laptop keyboard replacement on this particular model is very easy and takes just a few minutes. Here is a quick laptop keyboard repair tutorial with step-by-step instructions.

Once you have purchased the new keyboard, all you need to replace the old with the new is a screwdriver and something plastic, flat and thin like a credit card or guitar pick.

Step one: Remove the two screws from the bottom of the computer that are holding down the laptop keyboard bezel. The bezel is the bar that sits right above all the function keys.

Step two: Turn the computer over, open the cover and insert the credit card or guitar pick between the bezel and the computer screen. The bezel has pegs that sit in holes, you need to slowly pry up the bezel. It will make a bit of a popping noise as it is removed.

Step three: Now hold on to the laptop keyboard from the end closest to the screen and gently pull it away from the touch-pad end and flip it over. You will see the ribbon attached to the underside of the keyboard. There is a little plastic connector holding the ribbon to the computer. To unlock it, carefully pull up on the two tabs; one located on each corner of the connector. Be very gentle when you do this as this is the one part that gets broken the most often when changing a keyboard. The ribbon will now be released.

Step four: Carefully pull the ribbon out of the connector and remove it along with the entire laptop keyboard.

Final step: To insert the new laptop keyboard, place the board face down so you have easy access to the ribbon. Make sure the keyboard is lined up so when you flip it back over the keys are in the correct position. Keep the ribbon straight at all times; twisting it could damage it. Place the ribbon in the connector; it only goes in one way. Once in place, push down on the connector tabs to lock it. Now flip the keyboard over and slide it down toward the touch pad and take the bezel and line the pegs up with the holes and push it in place. Then turn the computer over and replace the two screws you removed from the bottom. You can now power on your computer and see if the keyboard works. If it is not working, more than likely the ribbon was not inserted properly.

Cleaning Laptop Keyboard

After having searched the web for advise about fixing a sticky keyboard on my laptop, and finding nothing very helpful, I put together this HOWTO based on my own successful method. This will restore the keyboard to new, or better, performance.Laptop keyboards don�t wear out, they foul out. Proper cleaning and lubrication as described here will restore your laptop keyboard to the snappy and smooth performance it had when new. There are several reasons why the keys will start to stick, spilled drinks, normal wearing off of the factory lubrication, weakening of the rubber pieces which give each key its snap action, and contamination by dust and hair. The following will completely solve these problems and return the keyboard to perfect operation.

This will require about 2 hours time once you have collected the proper cleaning materials.

  • Cleaning materials:
  • Cotton swabs
  • Cosmetic foam rubber cleaning pads ( use only with naptha (lighter fluid), NOT alcohol)
  • Paper towels
  • Rubbing alcohol
  • Water
  • Lighter fluid (naptha)
  • Fine tipped tweezers
  • Scissors
  • Kitchen strainer
  • Household cleaner, Windex or equivalent
  • Super Lube Dry Film spray (critical – DO NOT SUBSTUTUTE !) K-Mart automotive.
  • This is a PTFE (teflon) based lubricant which dries perfectly DRY and is ideally suited for this application.

Proceed as follows:

DISASSEMBLE
IMPORTANT: Make a keyboard map so you know where each key goes.
Carefully pry each key loose with a small screwdriver and place in a container. They pop off. DO NOT use excessive force. There may be a small rubber piece for each key. Remove all of these and place in a separate container. CAREFUL, these are small and like to jump away.

CLEAN KEYBOARD ( do this well…… you will be wonderfully rewarded )
Clean the keyboard with cotton swabs SLIGHTLY DAMPENED with water. Replace these often and BE SURE they are only slightly damp. If they are too wet the excess water will contaminate the keyboard through capillary action. This will clean all water soluble contaminants like Coca-Cola, coffee, and sugar residue. For the very small places, cut the foam rubber into small pieces and use the tweezers, again SLIGHTLY DAMPENED, for cleaning. You must clean each and every key space, inside and out, this is critical since this is where the key touches and moves.
Repeat this procedure again using rubbing alcohol and cotton swabs but NOT the foam rubber as it disintegrates when used with alcohol.
Finally repeat this procedure using naptha (lighter fluid) and foam rubber. You can clean even the smallest key guides with small pieces of foam rubber and tweezers. This action will remove any petroleum based contaminants as well as the grease that is sometimes used on the wider keys which may have guide wires, for example, the SCACE BAR.

CLEAN KEYS
Some keys may have wires attached and some grease on them, clean these first with cotton swabs and naptha (lighter fluid). Remove all traces of the grease.
Place all keys in a kitchen strainer. Spray with household cleaner and let stand for 5 minutes. Rinse thoroughly with hot water and place keys on paper towels to dry. Let dry completely.

CLEAN RUBBER COMPONENTS
Place all rubber components in a kitchen strainer. Spray with household cleaner and let stand for 5 minutes. Use stopper in the sink so that you don�t lose these if they jump out of the strainer. Rinse these thoroughly with hot water and place on paper towels. Fold the towels over and press to squeeze most of the water out of the pieces. Let dry completely.

LUBRICATE KEYS
Place all keys bottom-up on a paper bag. Lightly coat the keys, at a 45 degree angle with Super Lube Dry Film lubricant. Do this from all 4 sides to assure penetration and coverage into the small and critical guide spaces inside each key. Let dry ( this happens nearly instantly). DO NOT overdue this step as the carrier solvent may affect the plastic.

LUBRICATE KEYBOARD
Mask off the laptop with paper and scotch tape. Apply lubricant (as above in LUBRICATE KEYS) to the keyboard and let dry.
All right, you now have perfectly cleaned and lubricated keys, keyboard, and rubber components.

REASSEMBLE
Place all rubber components into the keyboard.
Install keys with wires. Make sure wire is secured in the key, usually snapped into place. Place ends of wire in the guide slots adjacent to the key location as you align the key. Firmly press down to snap the key into place.
Install the rest of the keys by aligning and firmly pressing down.

CONTRATULATIONS, you now have a keyboard which will operate smoothly and perfectly for years to come.

Replacing a Laptop Keyboard and Mouse

How to replace a Notebook Keyboard and Mouse with USB Adapter

First, if you’re just trying to replace a key that came off, I have a whole illustrated procedure. When your laptop keyboard fails, you can usually buy a replacement for somewhere between $60 and $120, but putting it in is a real bear, and given the current prices laptops have fallen to, it’s tough to justify as well. When you own the same notebook computer for as long as I have, the pointing device, be it a pad or an intellipoint thing, is going to fail. Laptop keyboard life is also somewhat limited compared to regular keyboards, hair winding around the works is a big problem, but I’d hate to encourage folks with limited mechanical skills to go prying off their keys because it takes some skill to get them back on. So, most notebooks have a PS/2 port to allow for an external mouse or keyboard, but few have both. You can try a PS/2 splitter if you can find one, but the more elegant solution is a USB to PS/2 adapter, shown at right. USB Keyboard and Mouse Adapter
Computer End of USB Cable The USB to PS/2 adapter comes equipped with a standard USB input, the rectangular shaped connector (left). The other end sports two PS/2 ports, green and purple, green is for mouse, purple is for keyboard. You don’t have to use them both at the same time, but for a notebook with a failing keyboard and pointer (Ahem) it’s a good solution. Windows has had native support for USB mice and keyboards at least as far back as Windows 98, I wouldn’t bet on ’95 as all the USB support was sketchy. The point is, as long as you’re using WIndows 98 or later, you don’t need any special software with the USB to PS/2 adapter.
So, what’s the big deal about installing a USB adapter that I did a whole page about it? Try it when the laptop CD drive has failed:-) The CD drive on my notebook went south over a year ago and I never got around to replacing it because I figured with a failing keyboard and mouse, I should be looking for a new notebook. The solution is to actually install the USB to PS/2 adapter on another PC with the same version of Windows. Then, install it on the notebook, and every time Windows looks for a driver on the CD that doesn’t work, point it to the A: drive instead, go to the other PC and copy the required file onto a floppy, and do sneaker net. It may have taken 20 minutes, but it’s a once in a lifetime job, so it was worth it.  Female Mouse and Keyboard Connectors
A large number of keyboard, mouse, and peripheral problems aren’t what they appear at first blush. I discuss troubleshooting peripherals in detail in the eBook version of The Laptop Repair Workbook and include a detailed flowchart with expanded text for troubleshooting peripheral problems. In case you’re wondering, if you want to install real software, as in programs that won’t fit on a floppy, onto a notebook with a dead CD drive, you can buy an external USB CD for much cheaper than a replacement drive for the notebook. Installing the software from the USB CD can be just as much fun as above, unless they provide the drive on a floppy, you’ll have to install the software on another PC with the same OS first and then bring the required files over one at a time as Windows asks for them. You can use a Jump Drive instead of a floppy, though it’s the same amount of work. BTW, I know I use laptop and notebook interchangeably, it’s habitual, not intentional:-)

Replacing Laptop Keyboard Key – How To Reattach Laptop Keys

The first time I had to replace a laptop key, it took me several hours. I struggled and struggled with the thing, trying to get the clip ends back into the little holder on the laptop keyboard membrane, using tweezers and jewelers tools. When the clip fell apart, I thought I was doomed. I put it back together and went right on trying to install the whole thing in one shot. I think I imagined that laptop keyboards were put together by extremely talented people with very small fingers, which may be the case, but it sure isn’t required. The picture to the right shows the standard arrangement of the four retention points on the keyboard. They can vary a little, some require more snapping in than sliding in. Missing "J" key from laptop showing hold-downs
Keyboard retention clip attached to the key The picture to the left shows your basic detached key with the assembled retaining clip still attached. I removed it from the keyboard for the sake of doing this illustration by prying up the top of the key a little and pushing the clip at the top inwards towards the center of the key on one side. Once one side is free, pulling towards that side releases the opposite side, and then the whole key can be slid down, towards the space bar, which releases it from the two little brackets that are closer together. Assuming you aren’t pulling your keyboard apart for fun, you may be starting with half the clip still attached to the keyboard (as below) with all the clip attached to the key, as to the left, or with all of clip mechanism attached to the keyboard, though that’s pretty rare. 
So the first trick is to realize that it’s nearly impossible to reinstall the key with the whole clip attached to it, because the larger half of the clip needs to be squeezed in to get under the holders. The retention holders at the top are essentially a closed “U” shape. It’s much easier to take two halves of the clip apart (they are simply snapped together) and install the larger piece that pivots at the top first. I’m showing that to the right, and you can do it with your fingers instead of a screwdriver, but I used the screwdriver so you can see something other than fingers. The next step (below) is to slide the smaller clip, with one end attached to the key, into the bottom two retention points. If you choose to do this without the key attached, or if it came apart on you, make sure the concave part of the smaller clip is facing down. It doesn’t take any force or squeezing, just place it inside the larger clip near the bottom and slid it towards the top. Once that’s done, you reassemble the two halves of the clip by just pressing the little pivot points into place, as at the lower right. Attaching lower half of key retaining clip
Attaching upper half of key retention spring SNapping together two halves of key holder
Assembled laptop key mechanism Now the whole mechanism is assembled and clipped to the keyboard and the top half of the key, shown to the left. All that’s left is to attach the bottom half of the key, which you do by just pressing on the key, shown below to the left. To review, the really critical part of the process is to detach the larger half of the clip from the key and install that on the keyboard first. After that, the smaller clip only goes with the concave part down and the beefier plastic end attaching to the top of the key, or pointed towards the top of the keyboard if the key isn’t attached. The fastest way to do the job is to install the two clip halves without the key attached and then just press the key onto them, starting it at the top since it’s a form of open retainer, and then the bottom just stretches into place when you push down. Whole thing takes a few seconds when you’re in practice and doesn’t even require a screwdriver.
There aren’t any problems easier to troubleshoot than a laptop key the cat has clawed off the keyboard, but what can you do if the cat pulled the laptop off the table and now it doesn’t work? The Lapop Repair Workbook is focused on troubleshooting laptop hardware problems so you can decide whether you want to repair your laptop, pay for a repair, or just buy a new one. It starts with an introduction to all the laptop technologies, follows up with basic troubleshooting and cost trade-offs, and finishes with over a hundred pages of diagnostic flowcharts and text explanations. You can purchase the 191 page printable eBook for instant download anywhere in the world for less than what you spend a week on kitty food. Repaired keyboard

How Computer Keyboards Work

When you look at all the extras and options that are available for new computer keyboards, it can be hard to believe that their original design came from mechanical typewriters that didn’t even use electricity. Now, you can buy ergonomic keyboards that bear little resemblance to flat, rectangular models with ordinary square keys. Some flashier models light up, roll up or fold up, and others offer options for programming your own commands and shortcuts.

But no matter how many bells and whistles they offer, most keyboards operate using similar technology. They use switches and circuits to translate a person’s keystrokes into a signal a computer can understand. In this article we will explore keyboard technology along with different key layouts, options and designs.

Non-standard layout and special-use types(2)

Foldable

Further information: Flexible electronics

A foldable keyboard.

Foldable (also called flexible) keyboards are made of soft plastic or silicone which can be rolled or folded on itself for travel.When in use, these keyboards can conform to uneven surfaces, and are more resistant to liquids than standard keyboards. These can also be connected to portable devices and smartphones. Some models can be fully immersed in water, making them popular in hospitals and laboratories, as they can be disinfected.

Projection (as by laser)

Projection keyboards project an image of keys, usually with a laser, onto a flat surface. The device then uses a camera or infrared sensor to “watch” where the user’s fingers move, and will count a key as being pressed when it “sees” the user’s finger touch the projected image. Projection keyboards can simulate a full size keyboard from a very small projector. Because the “keys’ are simply projected images, they cannot be felt when pressed. Users of projected keyboards often experience increased discomfort in their fingertips because of the lack of “give” when typing. A flat, non-reflective surface is also required for the keys to be projected onto. Most projection keyboards are made for use with PDAs due to their small form factor.

Optical keyboard technology

Also known as photo-optical keyboard, light responsive keyboard, photo-electric keyboard and optical key actuation detection technology.

An optical keyboard technology utilizes light emitting devices and photo sensors to optically detect actuated keys. Most commonly the emitters and sensors are located in the perimeter, mounted on a small PCB. The light is directed from side to side of the keyboard interior and it can only be blocked by the actuated keys. Most optical keyboards require at least 2 beams (most commonly vertical beam and horizontal beam) to determine the actuated key. Some optical keyboards use a special key structure that blocks the light in a certain pattern, allowing only one beam per row of keys (most commonly horizontal beam).

Further information: Keyboard technology

Non-standard layout and special-use types(1)

Chorded

While other keyboards generally associate one action with each key, chorded keyboards associate actions with combinations of key presses. Since there are many combinations available, chorded keyboards can effectively produce more actions on a board with fewer keys. Court reporters’ stenotype machines use chorded keyboards to enable them to enter text much faster by typing a syllable with each stroke instead of one letter at a time. The fastest typists (as of 2007) use a stenograph, a kind of chorded keyboard used by most court reporters and closed-caption reporters. Some chorded keyboards are also made for use in situations where fewer keys are preferable, such as on devices that can be used with only one hand, and on small mobile devices that don’t have room for larger keyboards. Chorded keyboards are less desirable in many cases because it usually takes practice and memorization of the combinations to become proficient

Software

Software keyboards or on-screen keyboards often take the form of computer programs that display an image of a keyboard on the screen. Another input device such as a mouse or a touchscreen can be used to operate each virtual key to enter text. Software keyboards have become very popular in touchscreen enabled cell phones, due to the additional cost and space requirements of other types of hardware keyboards. Microsoft Windows, Mac OS X, and some varieties of Linux include on-screen keyboards that can be controlled with the mouse.

Keyboard types

One factor determining the size of a keyboard is the presence of duplicate keys, such as a separate numeric keyboard, for convenience.

Further the keyboard size depends on the extent to which a system is used where a single action is produced by a combination of subsequent or simultaneous keystrokes (with modifier keys, see below), or multiple pressing of a single key. A keyboard with few keys is called a keypad. See also text entry interface.

Another factor determining the size of a keyboard is the size and spacing of the keys. Reduction is limited by the practical consideration that the keys must be large enough to be easily pressed by fingers. Alternatively a tool is used for pressing small keys.

Standard

Standard “full-travel” alphanumeric keyboards have keys that are on three-quarter inch centers (0.750 inches, 19.05 mm), and have a key travel of at least 0.150 inches (3.81 mm). Desktop computer keyboards, such as the 101-key US traditional keyboards or the 104-key Windows keyboards, include alphabetic characters, punctuation symbols, numbers and a variety of function keys. The internationally common 102/105 key keyboards have a smaller ‘left shift’ key and an additional key with some more symbols between that and the letter to its right (usually Z or Y). Also the ‘enter’ key is usually shaped differently.Computer keyboards are similar to electric-typewriter keyboards but contain additional keys. Standard USB keyboards can also be connected to some non-desktop devices.

Laptop-size

Keyboards on laptops and notebook computers usually have a shorter travel distance for the keystroke and a reduced set of keys. They may not have a numerical keypad, and the function keys may be placed in locations that differ from their placement on a standard, full-sized keyboard.

The keyboards on laptops usually have a shorter travel distance and a reduced set of keys.

 Thumb-sized

Smaller external keyboards have been introduced for devices without a built keyboard, such as PDAs, and smartphones. Small keyboards are also useful where there is a limited workspace.

A chorded keyboard allows pressing several keys simultaneously. For example, the GKOS keyboard has been designed for small wireless devices. Other two-handed alternatives more akin to a game controller, such as the AlphaGrip, are also used as a way to input data and text.

A thumb keyboard (thumbboard) is used in some personal digital assistants such as the Palm Treo and BlackBerry and some Ultra-Mobile PCs such as the OQO.

Numeric keyboards contain only numbers, mathematical symbols for addition, subtraction, multiplication, and division, a decimal point, and several function keys. They are often used to facilitate data entry with smaller keyboards that do not have a numeric keypad, commonly those of laptop computers. These keys are collectively known as a numeric pad, numeric keys, or a numeric keypad, and it can consist of the following types of keys:

  • arithmetic operators such as +, -, *, /
  • numeric digits 0–9
  • cursor arrow keys
  • navigation keys such as Home, End, PgUp, PgDown, etc.
  • Num Lock button, used to enable or disable the numeric pad
  • enter key.

Computer keyboard

In computing, a keyboard is a typewriter-style keyboard, which uses an arrangement of buttons or keys, to act as mechanical levers or electronic switches. Following the decline of punch cards and paper tape, interaction via teleprinter-style keyboards became the main input device for computers.

Despite the development of alternative input devices, such as the mouse, touchscreen, pen devices, character recognition and voice recognition, the keyboard remains the most commonly used and most versatile device used for direct (human) input into computers.

A keyboard typically has characters engraved or printed on the keys and each press of a key typically corresponds to a single written symbol. However, to produce some symbols requires pressing and holding several keys simultaneously or in sequence. While most keyboard keys produce letters, numbers or signs (characters), other keys or simultaneous key presses can produce actions or computer commands.

In normal usage, the keyboard is used to type text and numbers into a word processor, text editor or other program. In a modern computer, the interpretation of key presses is generally left to the software. A computer keyboard distinguishes each physical key from every other and reports all key presses to the controlling software. Keyboards are also used for computer gaming, either with regular keyboards or by using keyboards with special gaming features, which can expedite frequently used keystroke combinations. A keyboard is also used to give commands to the operating system of a computer, such as Windows’ Control-Alt-Delete combination, which brings up a task window or shuts down the machine. Keyboards are the only way to enter commands on a command-line interface.